What are actions?
Actions are special instructions that tell your bot how to behave when a user presses a button or enters a command. They work like "recipes" that guide the bot step by step in each situation.
With actions, you can add useful features to your bot. For example:
- Require users to join a channel before using your bot.
- Automatically increase or decrease balances.
- Send and receive automatic payments.
- Integrate your bot with third-party services.
- And many other possibilities.
How to add actions?
-
Choose the button or command
- Enter editor mode by clicking
🛠 Edit. - Select the button or send the command where you want to add actions, or create a new one.
- Enter editor mode by clicking
-
Open the actions menu
- In the button/command menu, choose
Actions 🌟.
- In the button/command menu, choose
-
Create a new action
- Press
🎯 New action. - Configure it by clicking
Configure 🛠. - Activate it with
✅ Activate.
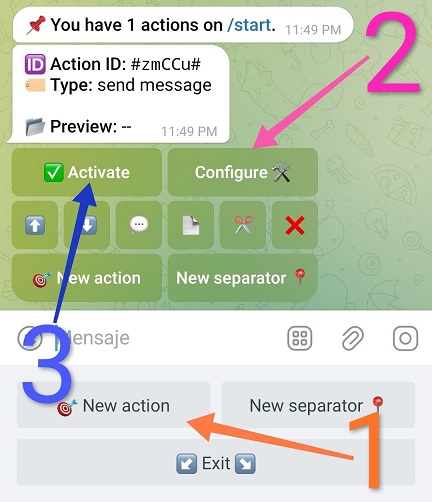
- Press
-
Use separators (Optional)
- Separators divide your actions into isolated blocks.
- More details about separators later.
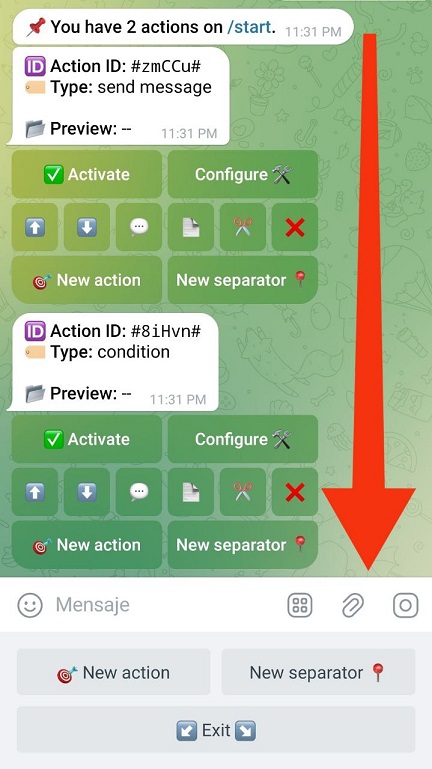
How do actions work?
Actions are executed in order: from top to bottom, one after another. Each action waits for the previous one to finish before running.
Important
If the button/command has messages configured with 💬 Messages, they will only be displayed after all actions have finished executing.
Two ways to add actions and separators
- Lower keyboard: Adds new actions at the end of all actions.
- Inline keyboard (next to each action): Adds new actions directly below a specific action.
Parts of an action
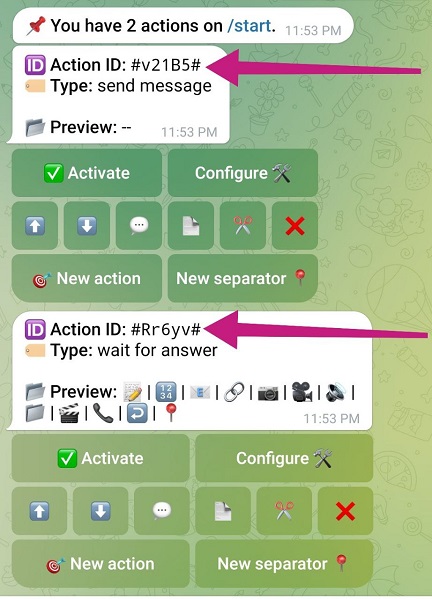
Each action displays the following information:
- Action ID: A unique ID like
#123AB#. This is used to trigger the action from other actions and retrieve data generated by that action. - Type: The type of action (e.g., send message, wait for answer).
- Preview: A summary of what the action does based on how you have configured it.
- Comment: Personal notes, only visible if a comment is added to the action.
Available buttons in each action
⬆️⬇️: Change execution order.💬: Add a comment.📄: Copy the action to another location within the button/command.✂️: Move the action to another location within the button/command.❌: Delete the action.🎯 New action: Add an action below.📍 New separator: Add a separator below.
What is the action ID?
Each action has a unique ID (e.g., #123AB#) that identifies it. With this ID, you can:
- Call the action from other parts of the button/command.
- Use the data it generates in later actions.
How to use data from one action in another?
Actions can return information (text, numbers, dates, etc.).
To use the data returned by an action in another action:
- Write the ID of the action that generated the data.
- Add a dot (
.) followed by the name of the data field. - Enclose everything within a expression, using curly braces
{ }.
Format:
{#ActionID.data#}
For example, to retrieve the username returned by the Chat info action:
{#ActionID.username#}
Replace
ActionIDwith the actual ID of theChat infoaction.
What are separators?
Separators allow you to divide actions into isolated blocks of actions.
The first block of actions is always executed when the button is pressed. Actions in other blocks will only run if explicitly triggered by their #ActionID#, using actions like Condition, Jump to action, or Run button.
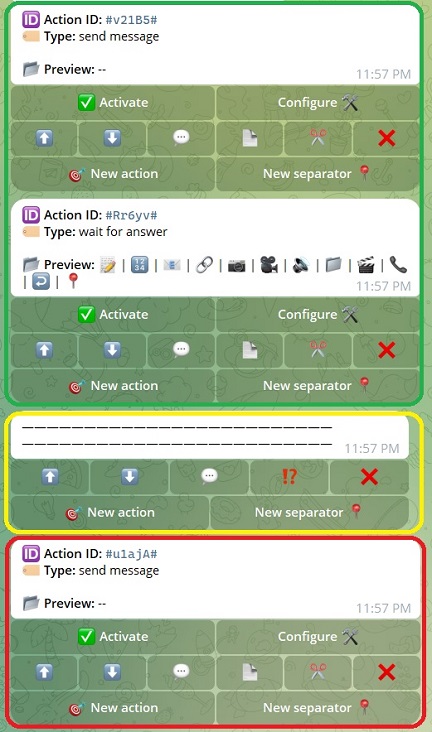
🟢 Green block: These actions always run when the button is pressed.
🟡 Yellow separator: This is the separator, indicating a division between blocks.
🔴 Red block: Actions here will not execute unless explicitly called.